Traders Edge • 01DTE Execution Stack
Home

Sell the confusion.
Trade the edge.

01DTE turns the NQ battlefield into a live execution map: dealer pressure, option walls, tactical zones, pin magnets, chart targets, trend drive, and micro range timing in one command surface.

Primary Use
NQ Scalping
Edge Source
Confluence
Trade Style
Wait / Strike
Core Rule
Reaction First

Seven layers. One trading read.

The edge is not one magic signal. The edge is when independent layers point to the same battlefield: where the wall is, where dealers are active, where price is accepting or rejecting, and where the next short-range path opens.

01

Ballistic Charm

Finds dealer pressure, shedding, tracking, rip walls, bounce floors, and liquidation zones.

02

Wall Hunter

Maps raw support and resistance walls above and below tape.

03

Tactical Wall Zone

Blends walls, pins, charm, and structure into the active decision zone.

04

EOD Pin Magnets

Shows the pin body and wings that can pull price into closing structure.

05

Chart Levels

Displays AI targets, tasty walls, opening range, session rails, and vacuum paths.

06

Omega Drive

Filters whether the move has real directional backing or is just noise.

07

Bubble Edge

Times the immediate micro range bounce, fade, or no-trade moment.

The modules that create the edge.

Dealer pressure

Ballistic Charm

Ballistic Charm marks the dealer battlefield. It shows the rip wall, bounce floor, liquidation pressure, and whether dealers are tracking or shedding exposure.

Rip Wall30500
Bounce Floor30450
Dealer StateLiquidation
Wall structure

Wall Hunter

Wall Hunter gives the raw map: the wall below, the wall above, the material strength, and whether price is between walls or colliding with one.

Below30430 - 30470
Above30530 - 30550
MaterialDefended
Confluence read

Tactical Wall Zone

The Tactical Wall Zone is the command layer. It asks whether tape is testing, accepting, rejecting, holding, or failing the blended decision area.

StateDecision Zone
ActionAccept Or Reject
TimerOn Wall
Pin gravity

EOD Pin Magnets

Pin magnets frame the close: pin body, wings, confidence, and whether price is being pulled into an end-of-day settlement battlefield.

Pin30500
Wings30450 / 30550
UseClosing Gravity
Chart truth

Targets + Vacuums

The chart tells the story visually: AI target destination, tasty call and put walls, vacuum paths, stops, opening range, and session structure.

DestinationAI Target
Fast PathVacuum
RiskTactical Stop
Direction filter

30 Min + Omega Drive

The 30-minute trend and Omega Drive filter the trade. They show whether price is below or above control, where the drive wants to go, and what invalidates the idea.

TrendDN 67%
DriveShort Pressure
Invalid30505

Chart levels make the battlefield visible.

When the chart labels line up with pin magnets, Ballistic Charm, Wall Hunter, and Omega Drive, the market stops looking random. The labels become destinations, reaction zones, and fast paths.

01DTE chart levels showing targets, walls, and structure
Chart View
Targets, walls, stops, and vacuum paths on one map.
AI Target
Destination and completion area
Target
Tasty Walls
Dealer option wall and magnet context
Wall
Vacuum
Fast path through open air, not a hard wall
Path
OR / Session
The structure rails that frame the day
Rail
Stop
The invalidation line for the tactical idea
Risk
READ
Price reaches AI target, reacts at the wall, and rotates into the pin zone.
EDGE
The trade becomes clearer when destination, wall, pin, and drive agree.
RULE
Trade the reaction at structure, not the middle of nowhere.

EOD pins turn the close into a map.

EOD Pin Magnets show where price can be pulled as the close approaches. The pin body and wings become powerful context when they overlap with Wall Hunter and Ballistic Charm levels.

Pin Body
The settlement magnet price wants to orbit
30500
Lower Wing
Potential support, bounce, or fail line
30450
Upper Wing
Potential resistance, breakout, or reject line
30550
Confluence
Pin + wall + dealer pressure becomes the battlefield
Edge
EOD pin magnet visualization from 01DTE
EOD Pin Magnets
Pin body, wings, and end-of-day gravity.

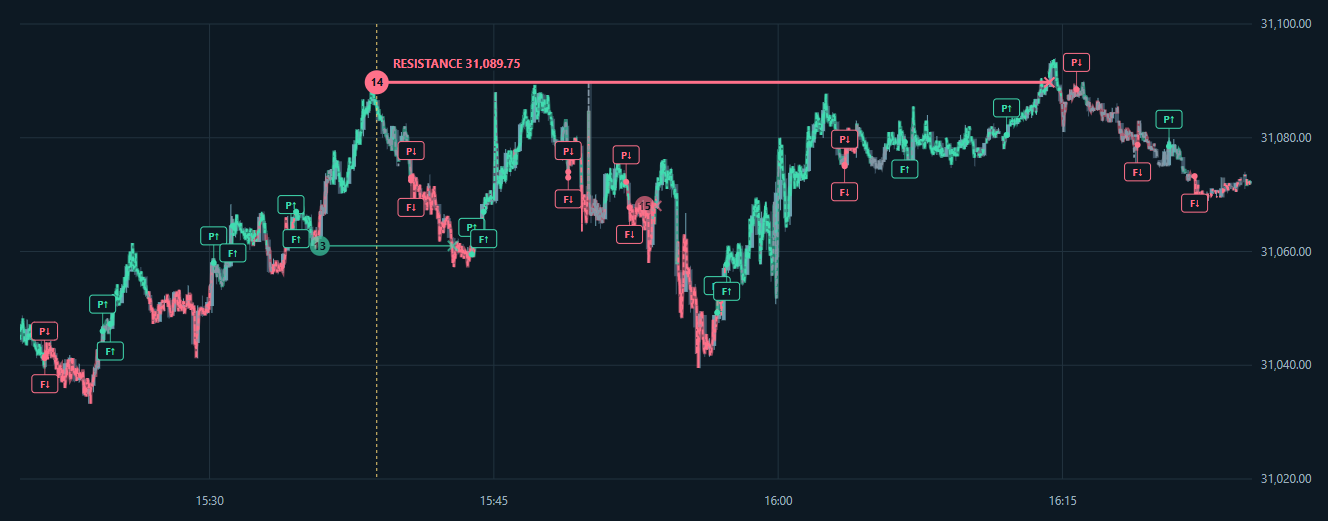
Bubble Magic is the right-now edge.

Bubble Magic is not level discovery. It is immediate range behavior. It watches the local pocket and tells whether tape is pressing, fading, bouncing, or trapped in chop.

Range Low
Watch sell pressure fade and buyers absorb. That is the bounce candidate.
Range High
Watch buy pressure stall and sellers hit. That is the fade candidate.
Middle
No edge. The system should tell you to wait instead of forcing a trade.
Break
If pressure expands and price leaves the range, the read shifts from fade to continuation.

The edge is the overlap.

Any single module can be early, quiet, or incomplete. The edge appears when the stack agrees: the wall is real, dealer pressure is active, the chart has a destination, Omega Drive supports the move, and Bubble Magic confirms the immediate tape behavior.

Where
Wall Hunter, chart levels, EOD pins, and Ballistic Charm locate the battlefield.
Why
Dealer tracking, shedding, liquidation, and option walls explain why the level matters.
When
Tactical Wall Zone and Bubble Magic identify the moment the reaction becomes actionable.
Risk
Omega Drive and tactical stops define when the idea is wrong.

Get the map before the move.

01DTE is built for traders who want the battlefield, the pressure, the destination, and the invalidation before they press the button.

Sign Up Now